Matching Animals

One of our favourite activities is matching! Dinosaurs and animals seem to be the overall favourites, although pom poms and buttons are pretty close in the line-up. Typically when we do matching activities, we will have two similar objects near each other so they can find them and then match them. I'll show them how to do the first one, and then I let them take over from there. I almost never have to give Bean more direction than just saying to match them up. Munchkin doesn't always participate in these activities. He will be interested for a few minutes but as soon as he figures out what Bean is doing, he loses interest and finds something else to do. Today was one of those days and he preferred playing with the bigger animals (a moose and polar bear) and stacking some colourful storage bins and trays that we use for sensory activities.

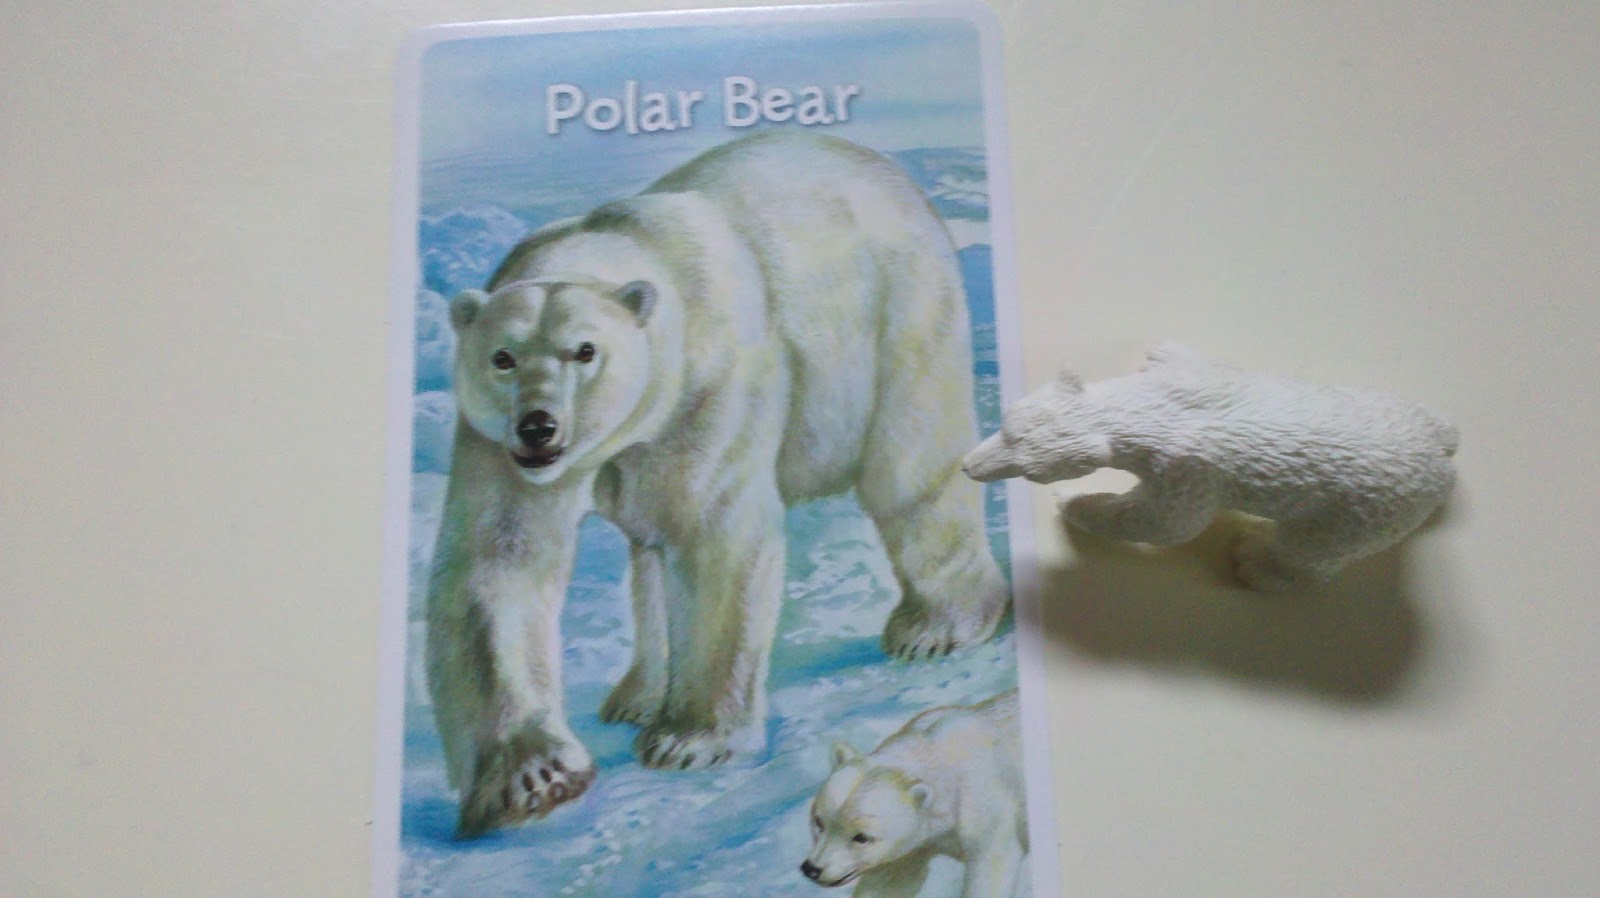
To start it off, we used two sets of animal flash cards (we also have two sets of dinosaur flash cards that we use for the same activity), and some animals from our Safari Ltd. Toobs (and a few others that came from the party store). Our animal and dinosaur flash cards were bought at Target in the dollar section and we love them! 


These cards are great because on one side is a wonderfully realistic painting of the animal and on the back side is some facts about them (we used two different cards). Bean really doesn't like when pictures are cartoonish, so I try to avoid buying those types. She especially loves these cards because she can tell right away what they are. Sometimes with the cartoon ones it's hard for her to match up the animals to the card.


We used 21 different cards (the deck has 36 cards but we only had 21 matching animal figures), so we used those ones. I put them in a bowl for them to pick through.


As you can see, they match up pretty well.

Bean enjoyed talking to the animals in growls and roars. She named each of the animals and didn't need any help at all matching them up.


Here she is using her fingers to count how many tentacles the octopus has.


Meanwhile Munchkin and Kaede watched the squirrels climb trees outside the window. (If you look real close, he's holding the big polar bear and moose.)


Bean tried to match up the animals exactly as they were painted on the card. Some animals, like this orca, matched up almost perfectly. Others she left alone if she couldn't get them to match up perfectly.


At one point she started to line up all the cards and eventually they went all along the edge of the table. This made it easier for her to spot a particular animal that she was looking for.


Then she dumped out the animals and spread them out as well. She did this activity many times over, simply because she enjoys it.


At one point I brought out a little magnifying glass for her to use. She enjoyed looking at the animals up close.


 They looked great all matched up!


Other activities that we do with the cards is matching the cards without the animal figures.


And using them for memory games. We pick out two sets of matching cards, flip them over and shuffle them up. Then we flip one over and then flip over a second, if it doesn't match, we flip them back down again. Munchkin loves memory games and it wasn't until this point that I was able to draw his attention back to the cards. Bean on the other hand does not like this game.


So while Bean and I were working on matching up the cards and animals, Munchkin was building a tower in the corner of the spare bedroom that we are now turning into an arts and crafts/learning room. He had so much fun and loved showing me what he created.


{If you enjoyed this post, please consider following me on Facebook and Pinterest. Thank you!}

Button Snake

I found the idea for making button snakes over at Happy Hooligans. She used felt squares for her snake, and we did too for the first button snake we made. Since then we have also made fabric squares and foam shapes. The felt squares definitely worked the best, but we like that the foam sheets and fabric squares are a bit more difficult. This is a great activity to promote fine motor development and buttoning skills. 

To make a button snake, all you need is a ribbon, two buttons, and whatever material you feel like adding to the button snake. Just keep in mind that when you cut the felt/fabric/foam you need to make sure there is enough wiggle room for the ribbon to fit through. 

I used small foam sheets and cut each one into 9 squares. 


When I finished cutting them up, I stacked them up and measured a few different ribbons against them. I chose one that was about half as wide as the foam sheets.


Then I divided the squares in half (three of each colour) and cut one pile diagonally and the other horizontally.


For my toddler son, felt was definitely the best option, because this is what happened when he tried to use the button snake with the foam squares. I didn't fret too much because I knew we'd just end up using those pieces as scraps for something in the future. But I also didn't want to leave him out while his sister enjoyed playing with the button snake, so I limited him to 10 squares. He did manage to get four out of the ten onto the button snake, so I see that as a success!


Bean definitely liked the challenge of having to carefully add the foam squares to the button ribbon. When she finished putting them all on, she held up the button snake like a trophy and proudly showed me her work. But like I said before, felt works best and we only used foam sheets to add a texture challenge to the activity. To make it more fun, we have also tried using a couple of each different material.


{If you enjoyed this post, please consider following me on Facebook and Pinterest. Thank you!}

Frog Eggs

So last week we played with frogs in a water bin with floating leaves for lily pads. This week I wanted to make another frog activity, but add some learning to it. 

One of my favourite childhood memories was sitting in my backyard by the frog pond watching the frogs. It was interesting to watch the eggs float around in a huge clump and a few weeks later to see them hatch into little tadpoles squirming around in the water. They normally swam around in school fashion like fish and about a month later they wouldn't really be cute little tadpoles anymore. They were "frogpoles" as I used to call them. Having characteristics of both, they looked odd to me, but it was always fascinating to watch them grow over the weeks. Finally they would be great big frogs! It always seemed to take forever for them to finally be adults, but those few months were totally worth it because by the time they were frogs, there were hundreds of them! 

I definitely plan on sharing my love of frogs with my kids. But they are still young, so we can't do a big frog life cycle activity yet. Though that will definitely be on my future to-do list. For now, we are keeping it simple. This activity shows them that frogs start out as little eggs. They sometimes clump together or float around on their own. The eggs are clear and the little frog inside is a dark spot, but we used black tapioca pearls to represent the eggs. I used green (lime) Jell-O for the frog pond. My old frog pond was pretty clear, but since frog eggs like to stick to algae and water plants, I figured green Jell-O would be an ok substitute. :)

I prepared the Jell-O according to the directions on the box and poured the mixture into a glass pan. I left it covered in the fridge for most of the day.


I brought some boba pearls home from our lunch trip to a Japanese cafe specifically for this project. I poured them into the corner of the pan, but as the Jell-O solidified they settled into the middle of the pan.


After dinner I brought out our little frog pond. Yes, this was inevitably a snack, but it was still educational.


I brought over a few of the frogs and sat the kids down around the bowl. I talked about how the boba was frog eggs and the Jell-O was pond water. Bean immediately plopped in this green and black froggie and said that it was the mama frog and she was protecting her babies.


I told them about my experiences growing up next to a frog pond and about about how long it takes for frogs to grow up. We talked about how they swim (we had just read a book about symmetry in nature, so it was interesting to see how she looked at the frogs and motioned with her arms and legs how they swim symmetrically), what they eat, and how active they are. Frogs like to float near the surface of the water, keeping their heads just above the water, keeping a look-out (the orange frog is demonstrating).


I showed them pictures of tadpoles so they could see what the little eggs would grow into. Afterwards Bean and I watched a YouTube video of the life cycles of a frog. She really enjoys videos like this because she likes watching them grow from a tiny baby into the creature that she recognizes.


And while Bean liked playing with the mama frogs and protecting the eggs, Munchkin enjoyed eating the Jell-O. Bean made sure he didn't eat any of the eggs, even though they are edible and perfectly fine to eat.


Mama and Dada frogs are watching their eggs hatch, according to Bean. :)


This little hatchling was born without a tail. :(


Bean put the hatchling in a bowl to look at it up close.


They spent quite a while exploring the little frog pond. Eventually Munchkin had removed all the frogs so many times that Bean stopped trying to protect the eggs and had a few bites of the Jell-O.


{If you enjoyed this post, please consider following me on Facebook and Pinterest. Thank you!}

Simple Small World: Frog Habitat

Our frog habitat is probably the simplest small world that we have created. And being simple, it is one of those habitats that will be fun to return to again and again. Especially because the weather has finally begun to warm up and besides, water bins are always super fun to play in!

To set up a simple frog habitat, all you need is a bin (or bowl or bucket or pool) filled with water, a drop of green food colouring (or liquid watercolors) to make it look like pond water, a few frogs and something to act as a lily pad (in this case, we used two different leaves that floated perfectly even after being submerged several times). 

The frogs sunk straight to the bottom and hung out there, waiting their turn to be played with. This one was the first to be selected to test out the make-shift lily pad. 


Bean really liked looking at the bin from above. She kept leaning over it and shifting the bin around to create ripples on the water. 


And of course, because it is a bin filled with water... a foot had to be dunked in.


Step-brother L liked tossing the frogs to see if they would land on the lily pad.


They submerged the leaves quite a few times and each time they lifted it up the leaves floated again.


The water looked really pretty when it rippled against the leaves.


The kids spent a lot of time playing in this bin before we went on a walk down to the river where we didn't see any real frogs, but we did see a ground hog! It will be fun to add some colourful gems or rocks and sticks to the habitat the next time we make it. Then the kids could make little diving boards for the frogs. :)

One of my ideas to add to this bin will be incorporating black tapioca pearls (aka Boba) as part of a "life cycles of a frog" series. Boba pearls would be perfect to use as frog eggs. They are squishy, almost the same size as frog eggs, and the right colour. They are also safe to be played with or eaten. We haven't tried any activities involving water beads yet, since my son still occasionally puts things in his mouth.

Another idea would be to use foam sheets as lily pads, since we could reuse them several times and wouldn't need to keep plucking leaves from plants. Or a plastic water lily plant could be used as well.

Always keep a close eye on your child(ren) when they are playing in water.

{If you enjoyed this post, please consider following me on Facebook and Pinterest. Thank you!}

Rainforest Habitat Small World

I have wanted to create a Rainforest Habitat for a couple weeks now, but I debated a lot about how I would present it. The main issue was that I didn't want it to be so dense that they couldn't find anything in it, which is exactly how a real rainforest looks. So I decided to work on it in parts, since I knew I couldn't add too many layers to our Rainforest Habitat because, knowing Munchkin, I predicted that it would all be pulled out and dumped on the floor.

Now, I wanted to add a layer of coffee grinds to the bottom, but it's raining out and all the plants were damp, so I didn't want the coffee grinds to stick to their hands (which they would hate). We will add coffee grinds next time when we take a closer look at the rainforest floor. For now we focused on the understory, which is the layer of the rainforest between the forest floor and the canopy. In the understory the leaves are wide to catch as much sunlight as they can manage, so I collected a couple plants with wide leaves. This layer is dark and humid, which is why I didn't bother to dry off the plants. It had just rained, after all.

However, just to note, we did add three animals that didn't quite belong in the understory: a gorilla, an orangutan and a white Bengal tiger. Gorillas and Bengal tigers live on the rainforest floor and orangutans live in the canopy. But I knew that while Bean would enjoy playing with the lizards and bugs, Munchkin would have more fun playing with his Little People animals. So they are in the bin for him.

Once again we discussed camouflage and I asked Bean if she could find some of the animals that were camouflaged. The two green lizards hiding out in the trees were camouflaged really well.


But the white Bengal tiger stood out (despite his best efforts to hide).


As did the blue snake.


And the pink lizard.


That poor pink lizard didn't stand a chance! But he was released unharmed by the predator Bean, after being tasted. Turns out he was a poisonous pink lizard, no wonder why he didn't bother to hide!


We talked about what sounds the animals make (or don't make) and what they eat. Orangutans eat fruit and occasionally tree bark, leaves, and even bugs! We settled on orangutans saying, "Ook." But she quickly moved on to the tiger, who likes meat like her.


Munchkin ended up collecting all of the Little People animals, as I assumed he would, and played with them outside of the box.


Bean spotted the different flowers I had put in the bin and we talked about the types of animals, birds and bugs that like flowers. This is a red clover and isn't found in the rainforest, however it is still tasty, since Kaede decided to eat them all.


Bean tasted it too and said she liked it. :)


Here the orangutan and gorilla are talking. The orangutan looks confused and I asked Bean why. She said, "Kaede eats," and pointed to Kaede eating the red clovers.


I believe the tables have turned and the tiger has a new friend. Although by this point, Munchkin has demolished half of the understory. The orangutan is sad. 


Bean was also fascinated by all the different plants that were in the bin and we talked about each one. We used words like long, short, wide, and thin to separate them. I told her why leaves had to be wide in the understory so they could catch sunlight shining through the canopy. For this big piece of grass she kept repeating, "no rain."


The understory was the easy part! I can't wait for them to discover who lives on the rainforest floor and in the canopy!

{If you enjoyed this post, please consider following me on Facebook and Pinterest. Thank you!}

© ANIMAL LIFE CYCLE 2012 | Blogger Template by Enny Law - Ngetik Dot Com - Nulis